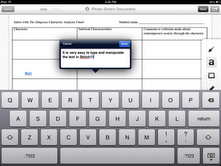
Skitch is a remarkable app that allows students to annotate
over images. I am currently working
daily with Bree Campbell , @breeanneshay, at Bellevue East to implement iPads
in her English classroom. We used Skitch
in the classroom to it’s fullest potential in our effort to create a paperless
classroom and a learning environment that is ubiquitous, not device dependent.
 One of the challenges we faced this week was taking a
character analysis chart and and transforming it into the digital, cloud-based
world so students can interact with the content anywhere. Since the chart
contained a table, Google Docs mobile was out, because the table feature is not
available yet on the iPad. We
brainstormed several alternatives including Pages, Notability, and Doceri, but
settled on Skitch since it allowed students to type on the image, size it
easily, save to a camera roll, and can be uploaded to Google Drive.
Step 1:
Getting the image to Skitch
First we tried to take a picture of the paper and import it
into Skitch. The quality was of the image ok, but we weren’t quite
satisfied. There had to be an even
better solution. And we found it!
On the computer, I copied the chart from Word (edità Select All-> Copy) to a PowerPoint slide (New Slide à Paste) and saved the
slide as an image, a JPEG.
To Save a PowerPoint Slide as an image do the following:
1.
File -->
Save As
2.
Click the Arrow and select JPEG from the choices listed.
3. Voila! A crystal clear chart and NO PAPER!
Note:
Remember where you save the image. I like to save to my desktop.
Then, we e-mailed the image to all the students to save in
their camera roll.
.JPG) |
| Photo taken of the chart. |
 | |||
| Chart saved as a JPEG from PPT |
Step 2: Editing and Saving the Image
The kids saved the image into their camera roll on the iPad,
then opened Skitch, and imported the image.
Each student added information to the chart daily and saved the image to
the camera roll at the end of the class period.
The classroom workflow for the week was, students open
Skitch, import their edited image from the previous day, and keep adding content. On Friday, students saved it to the camera
roll and e-mailed the completed chart to us for grading.
 | |
| Camera Roll = Save; E-mail = Hand In |
Here is a sample of the completed chart:
Now on to paperless
grading!
Written by Ann Feldmann
@techiefeldie
Written by Ann Feldmann
@techiefeldie


